
Stylist Guide › Section 3: Lighting › Rule #71
Three heights: ceiling, eye level, low. Most rooms use only one of them, and that's why so many listing photos look flat even when every light is on.
The rule in one minute. Light coming from a single height flattens a room. Place lights at three levels instead: high (ceiling lights and pendants), middle (table lamps and wall lights around seated eye level) and low (floor uplights, a lamp on a low shelf, under-cabinet glow). Mixing heights creates layers that the eye reads as depth and makes the room feel taller and larger. Aim for at least one light at each height in every main room.
Why height matters
"I've got four lights in the living room. Isn't that enough?"
"Where are they?"
"All in the ceiling."
"Then it's one light, four times."
Light from one height casts shadows in one direction. Four downlights all shine down. The result is one layer of light, repeated. The floor is bright, the tops of things are bright, and everything below and beside them is in shadow.
Light from three heights fills the room in three directions. Down from the ceiling, sideways from a lamp, upward from a low light. Shadows soften, walls light up, and the eye moves up and down the room instead of only across it.
Height also changes how tall a room feels. A low uplight washing a wall pulls the eye upward. A pendant hanging a little lower over a table pulls attention to the middle of the room. Together they make the ceiling seem higher.
How do you layer lighting at different heights?
Use one light at each of three heights: high (ceiling or pendant), middle (table lamps or wall lights around seated eye level) and low (a floor uplight, a lamp on a low shelf or glow under a cabinet). Spread them around the room so the high, middle and low lights aren't stacked in the same corner.
The Fix Ladder
Ten minutes: use what you own
"I don't have three kinds of lights."
"You probably do. They're just in the wrong rooms."
- Borrow a table lamp from a bedroom or study and put it on a side table in the living room.
- Move a small lamp to a low shelf or the floor beside a plant, pointing up.
- Turn on every ceiling light and check from the doorway.
One hour: fill the gaps
- Add a floor lamp in the darkest corner (Rule #65 has the heights).
- Add a plug-in uplight behind a large plant or in an empty corner.
- Swap globes so all three heights glow in the same warm colour (Rule #63).
One weekend: build the layers in
- Add plug-in wall lights beside the bed or sofa, with a cord cover.
- Install under-cabinet strips in the kitchen (warm white, diffused).
- Have an electrician add a pendant over the dining table if there's no fitting.
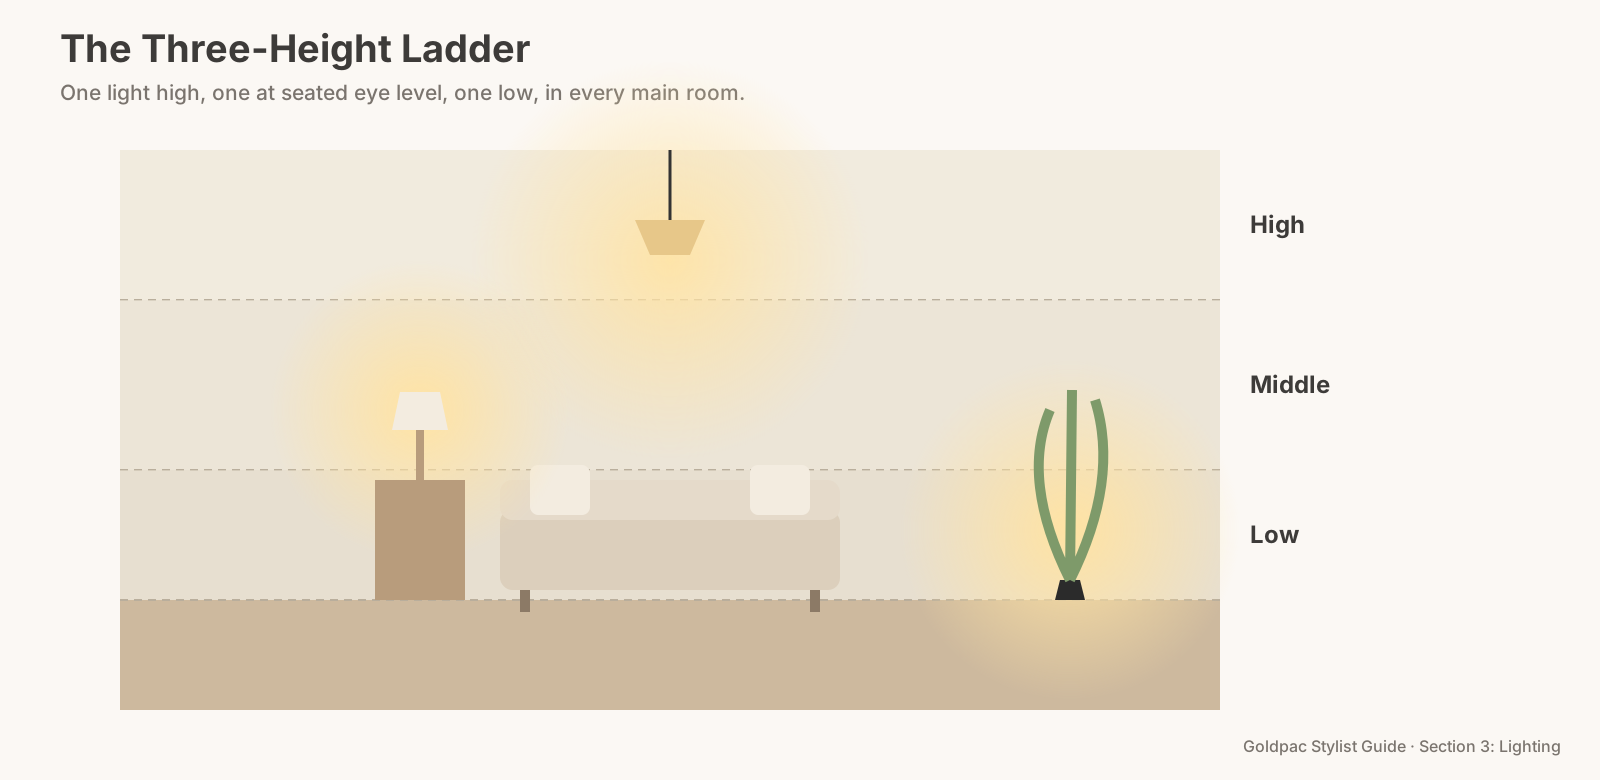
The Three-Height Ladder: one light high, one at seated eye level and one low in every main room, starting with what you already own.
The three heights, room by room
Living room. High: the ceiling light or pendant. Middle: a table lamp at the sofa. Low: an uplight behind a plant or a lamp on a low bookshelf.
Bedroom. High: the ceiling light. Middle: the bedside lamps. Low: a small lamp on a low dresser or a glow under a floating bedside table.
Dining. High: the pendant. Middle: a lamp on the sideboard. Low: candles on the table for twilight photos.
Kitchen. High: downlights or island pendants. Middle: under-cabinet light. Low: a kickboard strip, if you already have one.
Time and effort
- Ten-minute level: about 10 minutes per room, using lamps you own.
- One-hour level: a trip to the shops and an hour of placing and testing.
- Weekend level: a day or two, plus electrician time for anything hardwired.
The blind spot: you look at eye level
Most people never look at a room's lighting from more than one height. You see the room standing up, or sitting on the sofa. The low corners and the high ceiling don't register.
A photographer often shoots from a lower height, around chest level, which shows more of the floor and the low corners. If those are dark, the photo shows it.
What if…
You have a dog that knocks over low lights. Use a lamp on a sturdy low shelf instead of a floor uplight, or a wall light at lower height.
The room is a small unit bedroom. Two heights are enough: the ceiling light and a bedside lamp, with the lamp doing most of the work.
FAQ
How many layers of lighting does a room need? Usually three: general light from above, task or lamp light at seated height, and accent light low or on a feature. Not every room needs all three, but the main living areas benefit from them.
Layered light is a quick win that most homes skip. With Photo Ready Styling, our stylist styles your home with your own furniture and lamps before the photos, moving lights between rooms to give each one its layers. For empty homes, our home staging brings our own pieces: send us the address and a fixed styling quote lands within two hours. See current prices.
Keep reading: Rule #65: Floor lamps add height and warmth (where to put a floor lamp) · Rule #67: Light art, mirrors and corners to add depth (accent lighting on art and corners) · Rule #82: Don't hide lamps behind tall objects (keeping lamps clear of tall objects)
◀ Previous: Rule #70: Use table lamps to soften the bedside · Section 3 contents · Next: Rule #72: Use task lighting in kitchens and home offices ▶
Part of the Goldpac Stylist Guide: 300+ home staging rules from Goldpac's Sydney styling team.