
Stylist Guide › Section 3: Lighting › Rule #84
Saturday, 10:15. A couple steps through from the kitchen into the open living space. Their eyes go straight to a wide linen drum hanging low over a round timber table, glowing softly. They walk over, pull out a chair, sit down for a second. Nobody pointed them there. The light did.
The rule in one minute. A pendant over the dining table turns a table into a destination. Choose a pendant that suits the table's shape (a round or drum shade for a round table, two or three matching pendants or one linear fitting for a long one), centre it over the table, and switch it on for every photo and inspection. Size and position matter more than price: one well-placed simple pendant anchors a dining zone better than an expensive one in the wrong spot.
Why a pendant anchors the dining area
- It marks the zone. In open-plan homes, the pendant tells buyers "this is where you eat" without a wall (Rule #66 covers zoning with light).
- It's a focal point. A hanging light is one of the few objects at eye height in the middle of a room. The eye goes to it first.
- It makes the table feel used. A lit pendant over a set table suggests dinners, conversation and guests.
- It connects the table to the room. A table without a pendant floats; with one, it's fixed in place.
How do you choose a pendant for a dining table?
Match its shape to the table and its size to the table's width, then centre it over the table. Round and square tables suit a single round, drum or dome pendant. Long rectangular tables suit two or three matching pendants in a row, or one long linear fitting. The pendant's style should match the room's other fittings (Rule #83 covers mixing styles), and its height should keep the view across the table clear (Rule #73).
The numbers
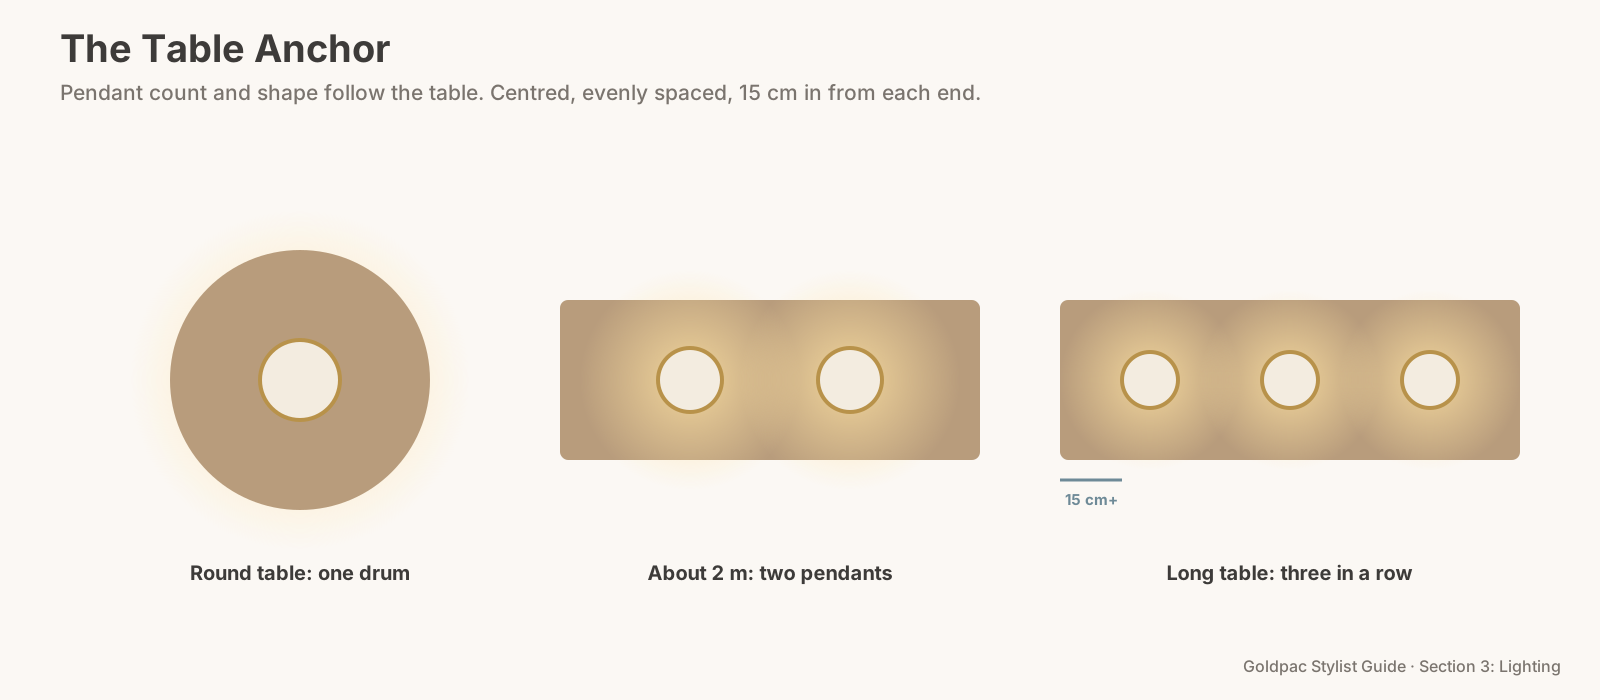
- One pendant for a round or square table, or a rectangular table up to about 1.5 m long.
- Two pendants for tables about 1.8 to 2.4 m long.
- Three pendants, or one linear fitting, for longer tables.
- 60 to 80 cm apart, roughly, between multiple pendants, evenly spaced.
- At least 15 cm in from each end of the table for the outer pendants.
- About half to two-thirds of the table's width for the shade's diameter.
The Table Anchor
- Measure the table: shape, length and width.
- Choose the pendant count and shape from the numbers above.
- Centre it over the table, not the room. Use a swag hook if the ceiling point is off-centre.
- Set the height so seated diners can see each other underneath (Rule #73).
- Fit a warm globe, the same colour as the other lights (Rule #63).
- Dress the table simply: a runner or bare timber, one centrepiece, chairs pushed in.
- Turn it on for every photo and inspection, day and evening.
The Table Anchor: a pendant shaped to suit the table, sized at half to two-thirds of its width, centred over it and lit for every inspection.
Example: the off-centre pendant
Picture a dining area in a renovated Sydney townhouse. The ceiling point was placed for the original layout, so the pendant now hangs over the corner of the table. In photos, it looks like a mistake, and the table seems to be in the wrong place. A swag hook brings the cord across the ceiling to the table's centre in an hour, and suddenly the table and the light belong together.
Styling the table under it
The pendant lights a stage, so set it simply. Clear the table of everything first: mail, laptops, fruit bowls, placemats. Then add one centrepiece, sized to the pendant: a low bowl or vase under a drum, a runner with two small vessels under a row of pendants. Keep the centrepiece lower than about 30 cm so it doesn't block the sightline under the light. Push the chairs in evenly, with the same gap at each. In photos, the pool of light should land on clean timber or linen and one beautiful object, not a busy table setting with plates and cutlery that date the shot.
For twilight photos, two candles in glass holders at the centre add a second, softer glow under the pendant. Light them only for the shot, and keep them well clear of the shade.
Don't over-design it
A statement pendant needs a calm table under it. If the pendant is sculptural or oversized, keep the centrepiece low and simple, and the chairs plain. Two statements fight.
Don't light an empty floor. If the table has moved for staging, move the light too, or switch it off. A pendant hanging over empty floor reads as a leftover.
If this, then that
- If there's no pendant point at all: a plug-in pendant on a ceiling hook, with the cord neatly run to a power point, works for the campaign.
- If the existing pendant is dated: a simple drum or dome replacement is a small job for a licensed electrician.
- If the dining table is against a wall: centre the pendant on the open part of the table, and add a lamp on the sideboard.
- If the home has no dining table: borrow one, or stage one. A dining zone with no table is a common gap in listing photos.
The blind spot: you eat in the kitchen
Many households rarely use the dining table. It collects mail, school bags, laptops and laundry. The pendant above it is hardly ever on.
Buyers picture family dinners there. Clear it, light it and set it simply before the first photos.
What if…
The pendant is a ceiling fan with a light. Turn the light off and add a lamp on a sideboard. A fan isn't a dining pendant.
The table is small and the pendant is huge. Raise the pendant toward the ceiling, or swap it for a smaller one.
FAQ
How many pendant lights should go over a dining table? Usually one for round, square and short tables, two for tables around 1.8 to 2.4 m long, and three or one linear fitting for longer tables.
Should a dining pendant be on during the day for photos? Yes. A lit pendant makes the table look welcoming even in daylight, and it marks the dining zone in open-plan rooms.
The dining table is the easiest place for a buyer to picture their own life. With Photo Ready Styling, our stylist styles your home with your own furniture before the photos, including the table under its light. For empty homes, Goldpac stages dining areas with our own pieces: send us the address and a fixed styling quote lands within two hours, through our home staging page. See current prices.
Keep reading: Rule #73: Dining lights should never block the view across the table (dining pendant height) · Rule #66: Use lighting to zone open-plan spaces (zoning open-plan spaces with light)
◀ Previous: Rule #83: Don't mix too many light fitting styles in one room · Section 3 contents · Next: Rule #85: Save fairy lights for outdoor and festive spaces ▶
Part of the Goldpac Stylist Guide: 300+ home staging rules from Goldpac's Sydney styling team.